Quickstart
Sign up, get a private docs repo, and publish your first Velu site: from the web editor or from GitHub.
This guide takes you from signing up to a live documentation site. You'll create an account, connect GitHub so Velu can host your docs in a private repository, then make your first change: either in the web editor or as docs-as-code by pushing to the repo.
Create your account
Go to docs.getvelu.com/signup and enter your company name, full name, email, and password, then select Create Account.
Velu sends a verification link that's valid for 24 hours. Open it to confirm your address: signup doesn't sign you in until you've verified.
During onboarding, connect your GitHub account and install the Velu GitHub
App. Velu creates a private velu_docs repository in your account from
the starter template and kicks off the first build automatically: so you get
a live site without pushing anything.
Pick a plan (the Free plan is enough to get started). Velu takes you to the dashboard, where your site is already building.
Prefer to skip GitHub for now? Choose Editor-only during onboarding and Velu hosts your content for you. You can connect GitHub later from the dashboard.
Your site is live at a your-site.getvelu.com address. From here, edit it in the
browser or from your new repository.
Edit in the web editor
Make changes without leaving the browser, preview them live, and publish when you're ready.
Open the web editor. The left panel has three tabs, Navigation, Files, and Config. Select a page to open it, and edit in the visual editor or switch to the source view.
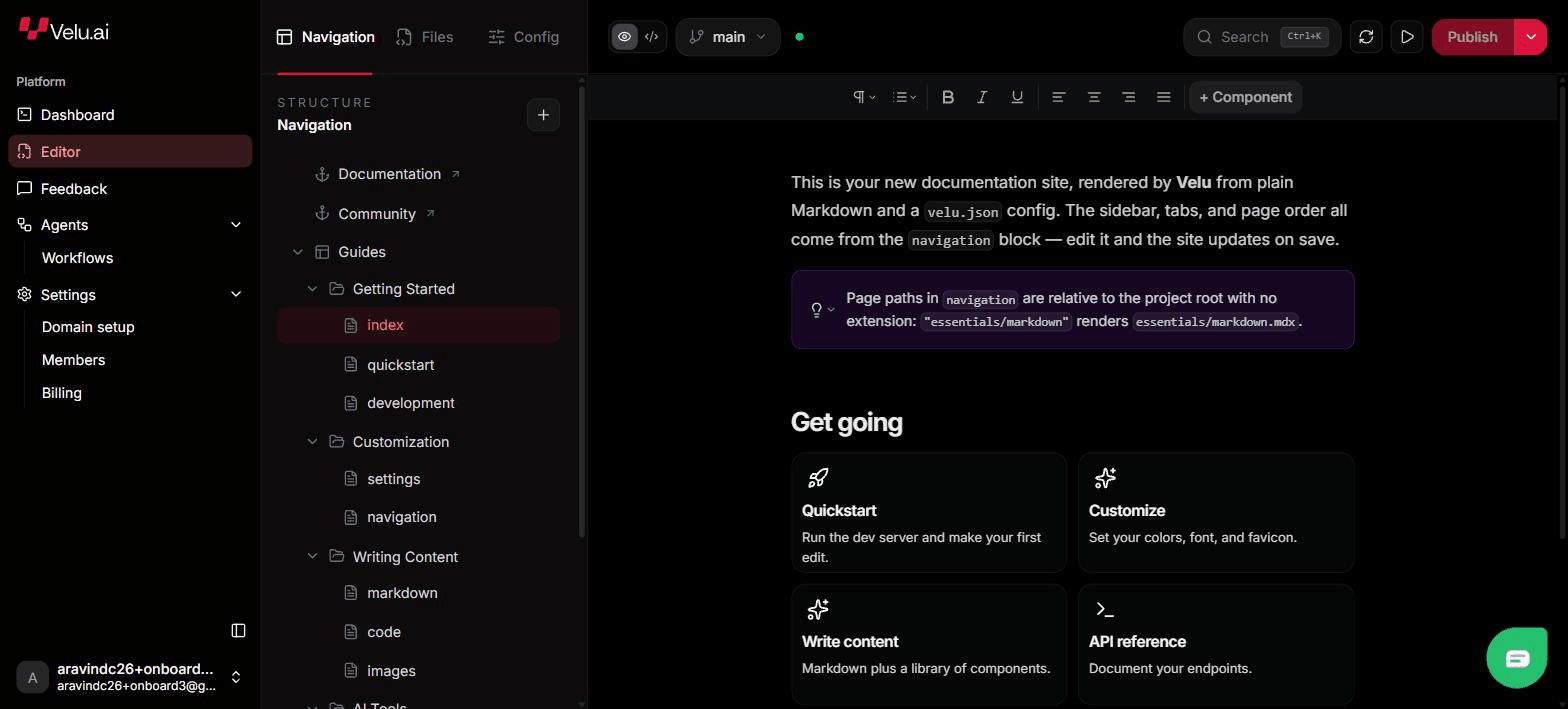
Select Instant preview (the play icon) to open a live preview in a new tab. It updates as you type.
Select Publish. The popover lists every file you changed (marked Added, Modified, or Deleted) and publishing rebuilds your site.
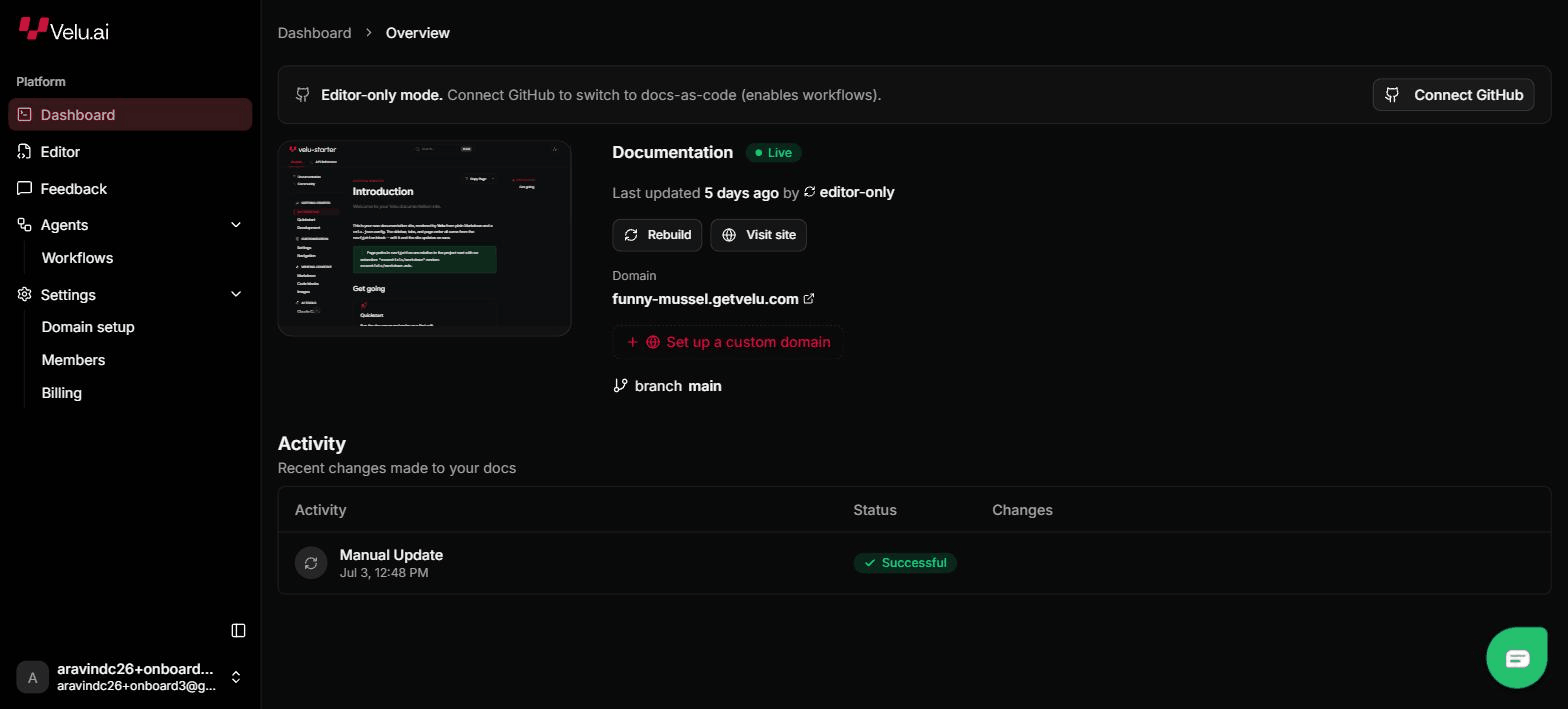
On the dashboard, the Overview shows your site
status (Live or Building), your getvelu.com address, and
Rebuild and Visit site buttons. When the build finishes, select
Visit site.
Edit with GitHub (docs-as-code)
Your docs live in the private velu_docs repository Velu created. Edit it like
any other repo: every push to the main branch rebuilds your site.
Clone velu_docs from your GitHub account. The
dashboard shows the exact URL.
git clone https://github.com/your-org/velu_docs.gitcd velu_docs
Edit any .mdx page or velu.json. To preview locally before you push, run
the dev server: see Local development:
npx @veluai/velu dev
Push your change to the main branch:
git add . && git commit -m "Update docs" && git push
Every push to main triggers a build. Watch it on the
dashboard (the Activity table moves the deployment from Building to Successful), then your site updates at
your getvelu.com address. See Publishing for
more on builds.